Tuesday, November 29, 2011

"PAXTON MARK GRIMES" ORIGINAL OIL PAINTING © NANA

Paxton Mark Grimes at 3 months
oil on canvas 6"x6"

Well, painting number one is complete...as near as I can in one sitting...there will always be the recheck after I've been away from it for awhile...He's my sweetie for sure...And, I'm off and running...I'd like to do several paintings of this boy for different members of the family before I'm done...WHEW...as usual...my December will be crazy busy...A big thanks to my friend Carol Nelson who gave me great advice IF I was going to attempt to paint a baby as to colors...Babies are hard to do as there is so little to them...ha...no wrinkles, no eyebrows...no wrinkles...but, my family wouldn't wait! LOL

I was also happy to find out I got "Late Summer Aspen" in a show that will be hanging at the Madden Museum in January...

And, Thanksgiving was wonderful!  I hope you all had a great turkey day too!  We were able to see my parents and my brother and his family; some of whom I haven't seen in many years...I'm unabashedly sharing photos of my wonderful family...topped off with my and my little guy of course!!  This is my wonderful brother Rick; who just so happens was having a birthday!

My sister-in-law Lori who I have shared MANY moments of pure delight...we laugh well together!!

And...my two beautiful nieces Kensey and Kaitlinn...I got to make jewelry with them and we had a ball!!
Grandpa Jerry got to meet his grandson for the very first time as we drove back home through Wichita where he was meeting his other great grandparents...
I've got to make a blurb book...whew...so little time and so much I want to do!!  

AND...of course I couldn't wait to get my hands on our little bundle of joy myself...Nana and Paxton...
What next??...well, more paintings of Paxton, and finishing my paper cast acorns, and doing something new and fun...I best get to it!!

HAPPY CREATING!

Sunday, November 27, 2011

COMING HOME!


I am actually writing this from my iPad IN the car on our way home from Oklahoma to see my parents. It was good to see people we love...but ALWAYS wonderful to come home!

Baby Paxton was in Kansas meeting his other great grandparents for the first time...but I couldn't stand not seeing him so we went home via Kansas and stopped to hug he and his beautiful mom and dad and extended family...grandpa Jerry got to meet him for the first time!


Yep, it was some good times! I hope you all had equally Happy Thanksgiving experiences! I'm comin home to my easel and my own BED!

HAPPY CREATING!

Friday, November 18, 2011

NEVER FEAR...I'M A WORKIN...JUST IN PLANNING PHASE!

we've titled this "The Thinker"...it reminds me of an earlier photo...so he must REALLY be a thinking awake or asleep!

Yep, it's "Family season"...that time of year when I buckle down and try to do as much for family as I can...OF COURSE there have been requests to paint our new little guy...so I'm going to ATTEMPT to do that...I was SO tickled to get to see my little guy last week...and can't wait until New Years to see him again when they all travel up to our mountain home!

The first photo I'm going to attempt to paint is this one...
It's the most recent face pic I have...the problems will be as I discussed last post...NO STRONG CONTRASTS...whew...I'm not really a portrait painter but I have to try...so...stay tuned!!  I've got him sketched out on a 6x6 canvas...so, let's see what happens...

It's a busy time at the Galloway house, but I won't forget you all...just squeezing art in between a ton of the stuff we all do at the holiday time...I've entered two shows for Colorado Watercolor Society and should hear if anything got in by December 1 and the end of December...so more about that later...
collage of entries for two shows...hmmm...I see a theme here...lol

AND, I'm tickled that my grandson has had his first driving lesson...I think dad is freaked out, but Paxton is really concentrating on the road! lol

HAPPY CREATING and HAPPY HOLIDAY TIME!!

Monday, November 14, 2011

"COLORADO COLOR" ORIGINAL MIXED MEDIA PAINTING OF ASPEN © SAUNDRA LANE GALLOWAY

"Colorado Color"
10x13"  16x20" matted and framed
$250 includes shipping in US
ON HOLD FOR A SHOW

This was a new experience for me.  It may look a lot like my signature aspen, but it was done specifically to enter into the Colorado Watercolor State Show that will be in March at the Foothills Art Center in Golden, CO.  I don't usually like to paint FOR a show, but I was intrigued to see how I could adapt my work to paper.  They have very strict rules as to how you work...it has to be ON PAPER.  Any collage materials have to be PAINTED by the artist...no store bought paper for this show...and it has to be under PLEXIGLASS.  WHEW... SO, I started out painting on a 140lb piece of watercolor paper with acrylics...
THAT was pretty ok...although the paper buckled a lot so I had to keep ironing it flat so I could work...After that I took several types of paper and painted and stamped on them and then tore them up to add to my piece...After which I added three aspen (remember I did all this yesterday as I've been gone...so the fewer aspen the better)...which I ended up finding just right as I enjoyed the abstract background I'd created using my handpainted papers...and, the end result under glass and matted and framed was this...
After it is all said and done, I'm not sure I enjoy painting my own papers...It might have been my strict deadline...but, I more think I enjoy the art of choosing papers from the stores and seeing how they fit my vision...it is part of the creative process for me...but that is just one artists opinion!  I hope to sway the board of CWS that one day they accept more work done on different substrates for more of their shows...we don't want to have our creativity stifled now do we?? hmmm...?  :)  I won't even know if I was accepted for a month or so...but, at least it is DONE...YEA!  

My next projects will be for my family, as I do every year...this year I'm going to try my hand at painting my little grandson.  This will be a challenge as all the photos I have of him were taken inside with no interesting shadows from sunlight...but...we work with what we have...:)  I'll post things as I get them done...and encourage my family NOT to read my blog for a bit so they won't see what MAY be their Christmas present! HA...We will see how that goes!!  

HAPPY CREATING!

Saturday, November 12, 2011

EXPERIMENT

Although I have already posted my handsome grandson today, I'm hoping this little experiment with my iPad will prove successful. I'm attempting to post AND include a pic I took WITH my iPad as well! Are you ready? Let's see if it works...


- Posted using BlogPress from my iPad

Yea!! HAPPY CREATING!

HOME and on the run!

I have literally 5 minutes!  Two awesome days with my little guy and I'm back home and running off to work an art show! WHEW.  Need I say I had a great time holding my little grandson!!  He was a delight...laughing, talking to anything with a face!  It was heaven!!  I'm really crunched for time to try to complete a finished piece tomorrow to send off in the mail for a show on Tuesday morning...but for now...Paxton talking to his monkeys!!
HAPPY CREATING!

Sunday, November 6, 2011

PAPER CAST ACORN PAINTING IN PROCESS

This painting is definitely in process...I've got my background in and my casts completed and placed with some oil painting on them...all fun stuff...and now I need to go in and add more...more paint, more collage items that I'm considering...but today my computer goes to the computer doctor, so I'm not sure when I'll post again.

Early tomorrow morning I'm leaving to spend a couple of days with my grandson and his parents in Omaha.  He is changing tons and I am missing it...so, off I go.  I'm going to take my ipad and ATTEMPT to post...but art stays at home, so they will most likely be pics of faces of those I love.  That is IF I am able to make it all work on that little ipad!  Wish me luck...and

HAPPY CREATING!

Saturday, November 5, 2011

ON MAKING STAMPS and TRAVELS...

Before I go too much further I want to talk a little about making stamps for use in the backgrounds of your work.  The example above is from a short video I got from the EMPTY EASEL newsletter that I get through my website Fine Art Studio On Line.  For any of you who subscribe to this website provider I encourage you to read the Empty Easel as it often has very informative information to help you in your creative endeavors!  The link for this promo for this particular process is: http://emptyeasel.com/2011/10/24/video-making-styrofoam-stamps-to-use-with-collage-paper-and-fabric/.  The stamp above is a quick example I made to see how it would work using acrylics...Could be FUN!  And, would have worked on my acorn piece had I chose to use it.

The second idea is very simple...I used a little hot glue and glued a stencil on to a square of 6 mm of fun foam.  This is an excellent material to use as it washes easily!  Even though stencils are very thin, they still have enough depth to make a stamp as you see below:
The third is also not invented by me, but used by me quite alot when I need a stamp that is the exact size and design for a particular piece.  I have included this in many of my blogs...but as a reminder these are the stamps I made for some of my acorn pieces.  The process was brought to me by a particular favorite blogger artist friend of mine...Alisa Burke.  The process is simple...Using 6mm fun foam cut out a design on one and hot glue it to another block of fun foam.  It is washable and durable!
to get the design in the center you can do several things.  Use a wood burning tool...cut it with an x-acto knife...(even drawing a line with the x-acto knife will cause a line to appear when you stamp!)

Making your own stamps just increases the original material within your artwork, making it that much more desirable and HARDER to replicate...making it THAT MUCH MORE DESIRABLE...or so goes the theory! HA.

Next week I am excited to say I will be traveling to Omaha to see my now nearly three month old grandson...I am SOOOO excited to see he and my beautiful daughter and most wonderful son-in-law...I will be able to get NEW photos of this new little person we all love so much with his Nana...the last photo I have with him is right before I walked out the door in August (where I bawled like a baby for an hour as I missed them so much already!) lol
When I return I will be working like crazy to produce but one more piece I will enter in the Colorado Watercolor State Show.  The thing about this show is the pieces have to be done on paper and under glass. Any collage papers we use have to be painted by us...all original stuff...That is where I will be using my handmade original stamps for background papers in one of my signature pieces.  It has to be all water media and painted in the last two years...So...stay tuned for that what ever it will be!!

HAPPY CREATING!

Friday, November 4, 2011

ACORN PAPER CAST IN PROCESS...AND ONE MORE ASPEN EXPERIMENT!

Let's start from the end and work backwards today...This is the paper cast acorn painting as it is today...The whole piece is going to be 10" matted, under glass with black frame.  Now...from the beginning.
I started with a 300lb piece of watercolor paper on which I added flexible modeling paste and stamped some texture in.  I absolutely LOVE texture, so every chance I get I put some in...THEN I took the acorn paper casts, gesso'd them and laid them in a composition, laying the matt on top to see if I'm going to like placement.

THEN, I stamp the background.  I have a favorite stamp I often use that is a bunch of little squares...and I also added an oak leaf stamp on top of that. (I made the stamp...you've seen it in my other acorn paintings)
For me it's about just putting color that will work in the background to imitate a sky color, and a leaf color...

And, that brings us to where you started...I re-laid the pieces down to see if it works with my background...The next step will be to adhere the branch, paint it...and continue to adhere and paint each piece...I'm going to use oil...so it might get a little tricky...stay tuned!

And, to continue with what I did yesterday...My last experiment for the day was to actually glue wire to the base to see if I can get rid of the too obvious thread showing...I used jewelry glue.  Later on I will pour another cast to see if it worked.  I used the smaller 24 gauge wire as I liked it best in my experiments yesterday!
sorry...the pic is blurry...I got in a hurry before I went down to make dinner...:)

oops...how did this get in here...OH WELL, since it's here...this is my little sweetie in his very first Halloween costume sent to him by ME...his Nana...:)  Gotta love that little pea pod!!

HAPPY CREATING!

Thursday, November 3, 2011

EXPERIMENTS, EXPERIMENTS...NOT A WASTE OF TIME!!

I'm never sorry I experiment...it's the path to discovery, and is what got me the style I currently work in...but, sometimes we get negative results...I've decided to show you the negative results...and some that I feel will work eventually.  As I discussed yesterday I was playing with an idea as to how to get the veins to show up in my aspen leaf paper casts without painting them after the fact.  These first three are different glues...It was my hope that there would be enough of a bump to make veins...The material I've decided to use is the screen from Arnold Grummer that I actually pour my molds on to.  I had a little extra, so cut it up...Here is the result of the first three experiments...
Yep...not what I was looking for...You may have to click on the photo to see the results more clearly.  The Elmers stuck to the cast even though it was dry when I poured...ps...this is a reminder of what the cast looks like in the mold...

The Beacon's craft glue ALMOST worked, but too spotty of a result to count on it consistently.  And, the "OK to wash it" fabric glue just soaked into the material (now that I think about it...duh) and there were almost no lines at all...SO...not to be discouraged I tried something different...
WIRE!...Yes, I took my jewelry making wire from those spools and actually sewed it on to the mesh screen...I wondered if the threads would show...here are the results from that experiment though I layed the wrong example in front of the wrong heading...24 gauge is smaller wire...just remember the bigger the number the smaller the wire...sorry...OH, and I spelled gauge wrong...sorry...when I'm experimenting I tend to overlook some things...bad...
This is really 20 gauge...the bigger wire...see how you can see the thread even! WHEW...gotta be careful...and...it MAY be a little large for veins...
  This is really the smaller wire...the 24 gauge...Turned out pretty decent, but I really need to be careful where I place the mold over this to get my veins right...might be my favorite...

SO that was the aspen experiment...It occurred to me that some of you may not know what Cotton Linters are...I order mine from Arnold Grummer on line...Michael's used to carry it, but they stopped due to lack of sales.
I LOVE this stuff...it comes in flat squares and bags like this...I like em all!

And, I wanted to show you an example of my acorn with it's top texture that you will remember is the drippage off of my friends epoxy pours...
If you look closely you can see it poking out from under the acorn I poured...It has to be squeezed under a screen, dry and then I can peel off the top texture...You are looking at the back.

AND...I just couldn't resist putting some color into this blog as most is pretty weak...My latest pic of my little Paxton...grandson...Ain't he cute!!
HAPPY CREATING!!

Wednesday, November 2, 2011

CANCELLATION LEADS TO A PROMISE...AND NEW IDEAS...

paper cast acorns with textured tops...(how did she do that you ask)...stay tuned!

It SNOWED last night...Yes, I know...it's winter...but it snowed on the evening before I was scheduled to do a demo for Mountainside Art Guild.  We had so much drifting due to wind that I couldn't get out so I had to cancel...something I absolutely HATE to do!  SO, I promised the group that I would be posting things that went a little further than the information in the paper cast/wax collage workshop I shared with them I wrote for Cloth/Paper/Scissors magazine in January.  In that workshop I detailed how I make my paper cast molds and applied wax as a collage agent.  For any of you who are interested in those processes it can be found in the Jan/Feb 2011 issue of Cloth Paper Scissors.  I would share it in this venue, but am not allowed to post those pages on the internet. sigh...

I have added a little new thing to some of my paper casts that you can see in my paper cast acorns above...TEXTURE in the cast!!  My first casts were merely shapes...which are great for some pieces, but with the sunflower and now my little acorns I felt a little texture would do some good...In the sunflower (my first one to step out into experimental land) I merely found a piece of fabric with texture and layed it face up before I poured my cotton linter (the stuff paper casts are typically made from)  When the cast process was completed you see the texture in the middle like in the photo below.
FUN DOINS!
they can then be painted realisitcally, or sort of "Cloth Paper Scissory" as is shown below in my 
"Sunflower Lines"
"Sunflower Lines" wax collage with paper cast...sold...:)
And, just so you can see how I get my molds made it in it's simplest form is just taking thin brass strips and bending them over a design you've drawn...like below:
sunflower...not a fried egg...:)

I bet you think I forgot to share what I used for the texture for my acorn tops that will soon be a completed paper cast painting...?  Nope...it is something I NEVER would have thought of...but I have a wonderful friend: Susan Gordon who epoxy's her artwork...and...this texture was the drip off of one of her epoxied piece!!  It had little dimples in it, and was thin enough for me to draw it and cut it out! MORE FUN DOINS! thanks Susan!!  

So...I made a little acorn mold for paper cast...and I made the paper cast
with cotton linter (stuff I order from Arnold Grummer Papermaking company) and let it dry...Imagine in the top area of the acorn...on the bottom (under the mold)  with texture facing up is the little epoxy drip texture (not shown)...below you can see a mold with the paper poured in...
nope...it isn't the acorn...it is my aspen leaf...
My new idea is about my aspen leaf casts...I'm playing with a way to use glue on cardboard for leaf veins...I'll let you know if it works!!

The next step would be for me to gently remove the mold and lay a screen on top and sponge it til it has little water left and then leave it to dry...overnight...then I peel it gently off and trim edges if necessary...and I'm ready to use it in a piece of artwork...AFTER I paint it with gesso first to seal it (remember it's paper, so water added directly on top would disintegrate it)

Just as a reminder...below are several things I've done with the paper casts...some are wax collage and some I've treated as a painting and sealed it and put it under glass (as with my aspen pieces)...Next I will share a little about a fun and VERY inexpensive way to make stamps that would be great for background for any of your collage work!!  Stay tuned!!

 "Rebirth"  sold
 "Orange Crush"  available
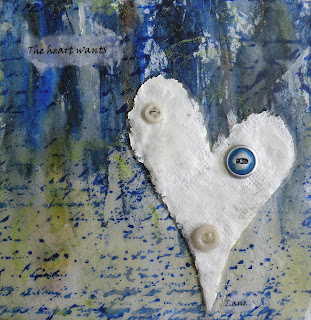
 "The Heart Wants"  NFS
 "Blackbird" sold
 "Freedom"  available
 "Sunflowers a' natural"  sold


"Star Lines"  available
 "Aspen Melody"  available (can be found in small works on my website)
"Aspen Gold"  available through my up the mountain gallery LUNA'S MANDALA in Conifer

HAPPY CREATING!!

© Saundra Lane Fine Art

All rights reserved. All work created is protected under copyright law and must not be reproduced without express permission of Saundra Lane Galloway

READ MY PUBLISHED ARTICLES ON CREATIVE TOPICS

READ MY PUBLISHED ARTICLES ON CREATIVE TOPICS
follow the link and click subscribe if you want to receive my articles as they are published

A SIGNATURE MEMBER OF COLORADO WATERCOLOR SOCIETY

LinkWithin

Related Posts Plugin for WordPress, Blogger...